RECENT ARTICLES
- CEBRA: An optimised and standardised sampling protocol for BioBlitz
- Stop it people, the plural of anecdote IS data!
- That's no pollinator, that's a flower visitor
- Add a scale to your macro photos
- What to photograph when counting the wild
- Imagine counting the wild on EVERY street in a city!
- My wild counting workflow
- A butterfly flew through
- Why iNaturalist observations without photos can be research grade
- Why you shouldn’t use a spreadsheet for data entry
- All articles ...
Geotagging time stamped observations with a GPX file from a GPS
All you need to record lots of individually geotagged observations is a notebook, watch, and a GPS set to track.
written Apr 15, 2015 (last updated Oct 31, 2023) • by jonsullivan • Category: Data Wrangling

I count a lot of things (my current observations on iNaturalist NZ are just some of the photographed tip of my data iceberg). All my observations of species are most useful if I know exactly when and where they were. When I’m making a lot of observations, I find it’s quickest to record only the “when” (the time stamp) and get the “where” later. In other words, I have a GPS tracking my movements on a trip, and I just record the time of each observation in the field. I can then automatically calculate the “where” for all my observations later, by syncing their time stamps and the GPS track.
I’ve already been doing this with my camera for some time. My DSLR camera doesn’t have an in-built GPS. However, like all digital cameras, it records the date and time of the photo in the photo file. I ensure that its clock on my camera has the accurate time. I then GPS track my movements, usually just with the Cyclemeter app on my iPhone, although sometimes with a professional GPS unit (they give more precise data under a canopy).
When I get home, I geotag all of my photos from the trip on my Mac by automatically connecting the photos with the GPX file exported from Cyclemeter. I used to use Apple’s now discontinued Aperture, and I now use the free and open source Darktable. There are several other desktop photo apps that can do this too [update: see this handy iNaturalist video on how to do it with Adobe Lightroom]. It’s quick and easy and I end up with accurate GPS-sourced locations on all my photos.
I’ve always figured that it should be just as easy to do this with my species notes, so I’ve been time stamping them too. Last month, I finally sat down and wrote an R script to connect all these observation to their locations. Here’s how I did it.
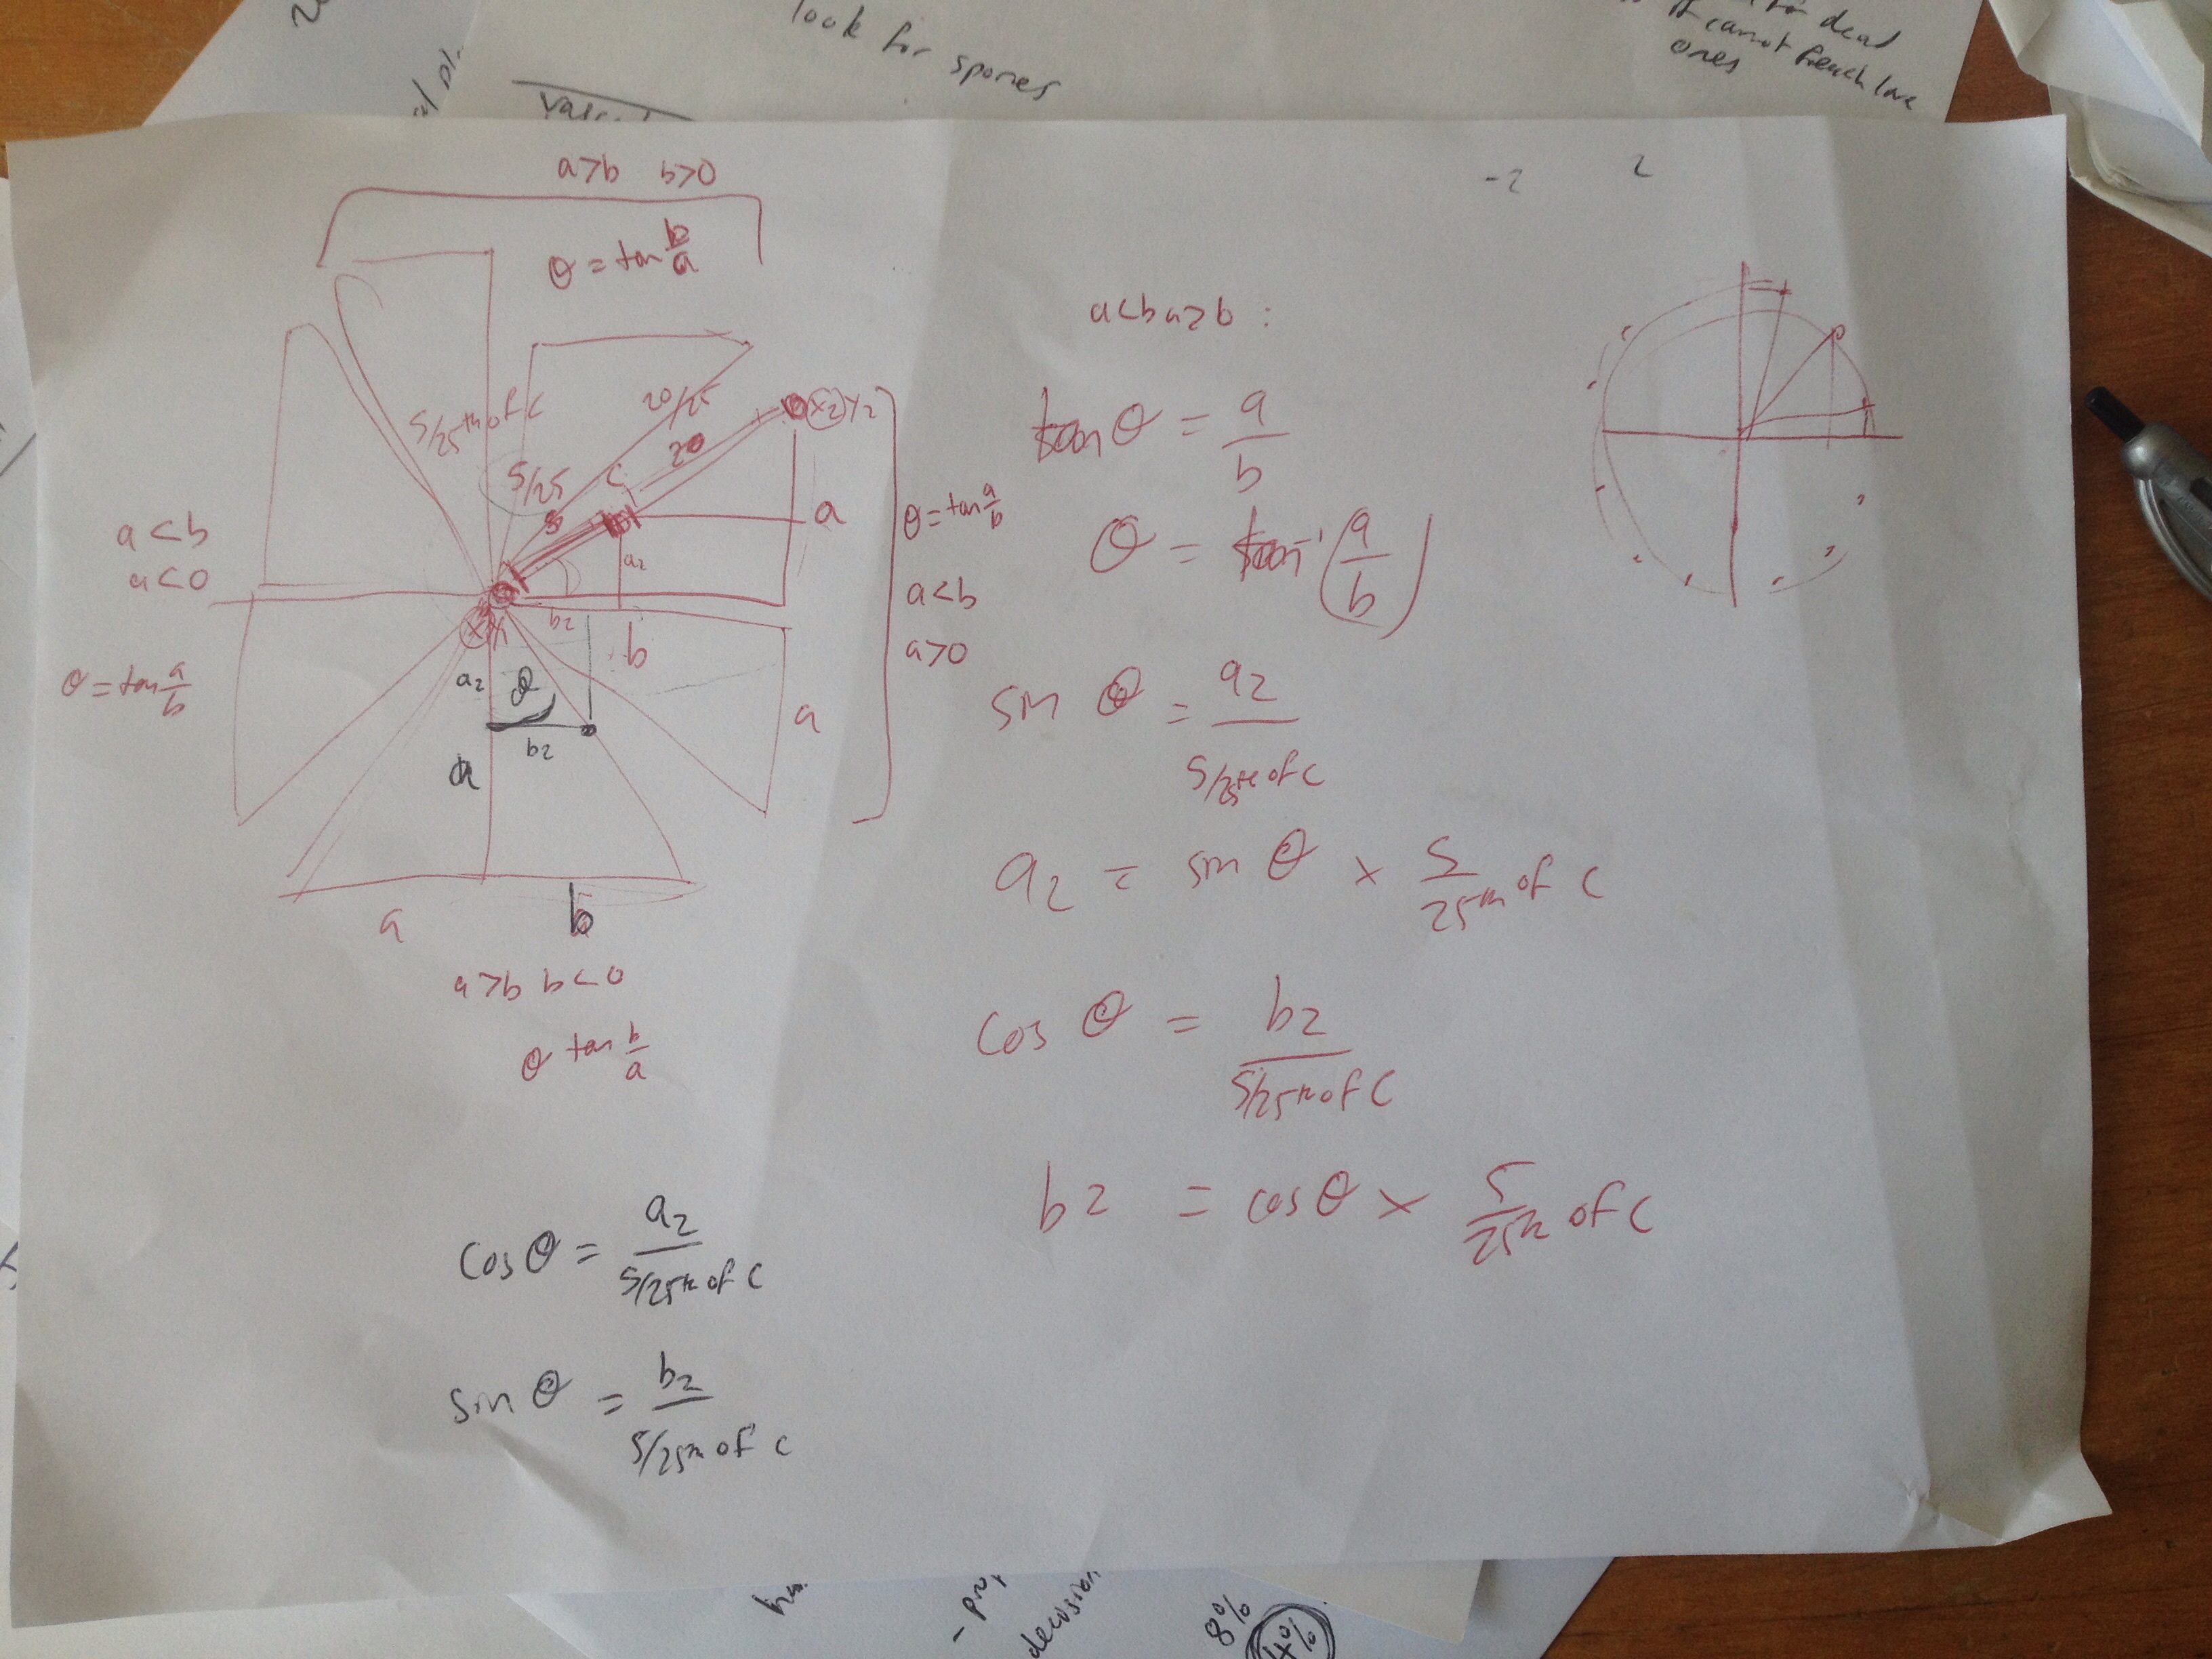
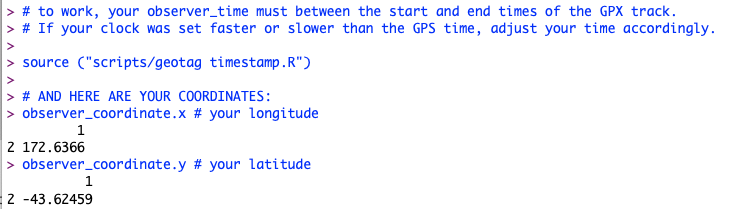
My R script reads in the GPX file exported from Cyclemeter (this file could as easily come from a GPS unit). It also reads in the dates and times of my observations. It estimates the location of each observation using some simple trigonometry between the nearest waypoints in the GPX and the assumption of constant speed between those waypoints. It exports the geotagged observations back out.
You can find my geotagging R script on Github. If you’re new to R, it’s a free computer app for wrangling, analyzing, and graphing data. To run an R script, install R on your computer, make sure R is closed, and double-click on the script file to open R. Doing it that way makes sure that R automatically looks for your data in the folder containing your opened R script. You’ll need to update the start of the script to include your GPX file’s name, your time zone, and the date-time that you want to geotag.
I should add that I use a Filemaker Go custom app on my iPhone to record all of my observations, and the latest versions of Filemaker Go can add a GPS coordinate to each observation along with the time stamp. I was excited when that feature came out, and immediately added it to my app. I was disappointed to then find that there’s often a several 100 m lag in the geotags from Filemaker Go, for reasons I don’t understand. Syncing later with the GPX track from my Cyclemeter app does a much better job of geotagging. Cyclemeter must be updating its GPS location more rapidly than the internal iPhone system that Filemaker Go is accessing.
So, even now, I use my R script to combine the observation timestamps recorded in Filemaker Go with the Cyclemeter GPX file to refine the coordinates of all my observations. If I have access to a commercial GPS unit on a longer trip in the wilderness, I can have that do the tracking. I can then switch my iPhone to airplane mode and turn off location to save battery.
This all means that you only need three thing to accurately and quickly record lots of properly geotagged wild counts. First, you need a GPS, or smart phone GPS app, set to track where you go. Second, you need to accurately tell the time. Third, you need somewhere to write timestamped observations. While all this can be done on a smart phone, if you’re old school or your smart phone’s battery is flat, you can just as easily attach a GPS unit to your backpack and record fully geotagged observations using just a watch and a notebook.